
How to Sharpen a Kitchen Knife at Home
Without Ruining It
Whetstone, honing steel, or pull-through? The matchbook trick for finding the right angle, the 3 mistakes that destroy knives, and a 5-step method that works.
A dull chef’s knife isn’t just slow — it’s dangerous. When a blade can’t grip the surface of a tomato, your hand compensates by pushing harder, and that’s when it slips sideways into your finger instead of through the food. Every emergency room doctor will tell you: dull knives cause more kitchen injuries than sharp ones.
The problem isn’t that people don’t sharpen their knives. It’s that they sharpen them wrong. Pull-through gadgets that grind away steel unevenly. Electric sharpeners that overheat the blade and ruin the temper. YouTube tutorials that show the angle wrong. We’ve seen $200 Japanese knives destroyed in 30 seconds by a $15 pull-through sharpener that was never designed for hard steel.
Here’s how to actually do it — the right tool for the right knife, the angle that matters, and the three mistakes that ruin more kitchen knives than anything else.
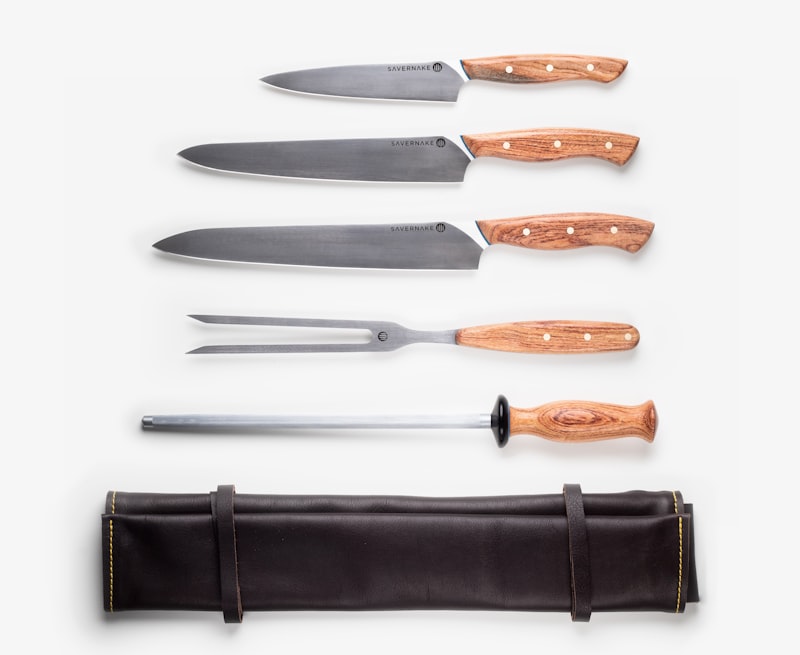
First: Honing vs. Sharpening — They’re Not the Same Thing
This is the confusion that costs people money. Honing straightens the edge — it doesn’t remove metal. Think of it like combing hair that’s gotten messy. The hair is still there, it’s just out of alignment. A honing steel (that long rod that came with your knife block) realigns the microscopic edge of your blade, which bends slightly with every cut. Hone before every cooking session — it takes 15 seconds.
Sharpening creates a new edge by grinding away metal. It removes material. You need it when honing no longer works — when the edge has actually worn down or chipped, not just bent. For a home cook using a knife 4–5 times a week, that’s every 3–6 months.
The Four Sharpening Methods — Compared Honestly
| Method | Skill needed | Metal removed | Best for | Avoid if |
|---|---|---|---|---|
| Whetstone | Medium-High | Controlled | All knives — the gold standard | You have zero patience for learning |
| Honing steel | Low | Almost none | Maintenance between sharpenings | Knife is actually dull (not just misaligned) |
| Pull-through sharpener | None | Aggressive | Cheap Western knives, quick fix | You own Japanese or high-end knives |
| Electric sharpener | None | Very aggressive | Household knives you don’t care about | Any knife you value |
How to Sharpen on a Whetstone (Step by Step)
A whetstone is the only method that gives you full control over the angle, pressure, and amount of metal removed. It’s how professional knife makers sharpen. It takes 5–10 minutes once you’ve done it a few times.
What you need
- A combination whetstone: 1000 grit on one side (sharpening), 3000–6000 grit on the other (polishing). A King KW65 1000/6000 costs about $25 and lasts years.
- A towel and a shallow container of water.
- Your knife.
Step 1 — Soak the stone
Submerge the whetstone in water for 10–15 minutes until bubbles stop rising. A dry stone catches the blade and gouges it. Place the wet stone on a damp towel so it doesn’t slide.
Step 2 — Find your angle
This is where most people fail. For Western knives (Wüsthof, Victorinox, Henckels): hold the blade at 20 degrees. For Japanese knives (Shun, Global, MAC): hold at 15 degrees.
Here’s the trick nobody teaches: stack two matchbooks under the spine of the knife while the blade sits flat on the stone. That’s roughly 15 degrees. One matchbook is about 12 degrees — too acute for most kitchen knives. Two matchbooks gets you to 15°. For 20° (Western knives), use two matchbooks plus a coin. Once you’ve felt the angle a few times, you won’t need the matchbooks anymore.
Step 3 — Sharpen
Place the heel of the knife on the far edge of the stone. With one hand on the handle and two fingers of the other hand pressing lightly on the flat of the blade near the edge, push the knife away from you in a sweeping arc — heel to tip — while maintaining the angle. Light, consistent pressure. Heavy pressure doesn’t sharpen faster, it just removes more metal unevenly.
Do 5–10 strokes on one side, then flip and do the same on the other. You’ll feel a slight “burr” on the opposite side — a tiny lip of metal that tells you the edge has been ground to the apex. That’s how you know each side is done.
Step 4 — Polish
Flip the stone to the fine side (3000–6000 grit). Repeat with lighter pressure — 5 strokes each side. This removes the burr and polishes the edge smooth.
Step 5 — Test
Wipe the blade clean. Try the paper test. Then slice a tomato — a properly sharpened knife will glide through the skin without any downward pressure from your hand.
📖 Not sure which knife you’re working with?
Our guide covers steel types, edge angles, and what to look for: How to Choose a Chef’s Knife →
The Three Mistakes That Ruin Kitchen Knives
Mistake 1: Using a pull-through sharpener on a Japanese knife
Pull-through sharpeners use fixed carbide or ceramic V-slots set at one angle — typically 20–25 degrees. Japanese knives are ground to 15° per side. Running a 15° blade through a 20° slot tears the edge instead of sharpening it. It’s like forcing a Phillips screwdriver into a flathead screw — technically it makes contact, but it destroys the geometry. If you own a Shun, Global, or MAC, never use a pull-through. Whetstone only.
Mistake 2: Using an electric sharpener on any knife you value
Electric sharpeners spin abrasive wheels at high RPM. Two problems: they remove far more metal per pass than a whetstone (shortening your knife’s lifespan), and the friction generates heat that can affect the steel’s temper — especially on high-carbon Japanese blades. A $30 electric sharpener can remove as much metal in 10 seconds as a whetstone removes in 10 minutes. That’s not efficiency, that’s damage.
Mistake 3: Putting knives in the dishwasher
This isn’t sharpening advice, but it’s the #1 reason knives go dull fast. The high-pressure water slams the blade against racks, other utensils, and the interior walls of the machine — hundreds of micro-impacts that roll and chip the edge. One dishwasher cycle undoes a week of careful honing. Hand wash, dry immediately, store in a block or on a magnetic strip. Your knife will stay sharp 3–4 times longer.
Maintenance Schedule: How Often to Sharpen
| Usage level | Honing | Whetstone sharpening |
|---|---|---|
| Daily cook (5–7× per week) | Before every session | Every 2–3 months |
| Regular cook (3–4× per week) | Every 2–3 uses | Every 4–6 months |
| Occasional cook (1–2× per week) | Weekly | Once or twice per year |
The interval also depends on what you cut. Bones, frozen food, and hard squash dull blades faster than vegetables and boneless meat. And your cutting board matters — wood and plastic are gentler on edges than glass or ceramic boards, which destroy knife edges on contact.
The Bottom Line
A whetstone, a honing steel, and 10 minutes every few months — that’s all it takes to keep any kitchen knife razor-sharp for years. Skip the electric gadgets, skip the pull-through devices (unless your knives are cheap and you don’t care), and never put a knife in the dishwasher. The tool that matters most is the angle you hold — and now you know the matchbook trick to find it.

King KW65 1000/6000 Whetstone
~$25. Dual grit — 1000 for sharpening, 6000 for polishing. The stone most knife professionals recommend for home use. Lasts years.
Check Price on Amazon →
Ceramic Honing Rod
Ceramic preferred for Japanese knives, traditional steel for Western. Hone before every cooking session — 15 seconds to realign the edge.
Check Price on Amazon →🔪
A Knife Worth Sharpening
Good steel rewards good maintenance. We tested 5 chef’s knives on edge retention, balance, and steel quality.
Best Chef’s Knives 2026 →Frequently Asked Questions
How do I sharpen a kitchen knife at home without ruining it?
Use a whetstone (1000/6000 grit combination) at the correct angle for your knife — 15 degrees for Japanese, 20 degrees for Western. Soak the stone first, use light consistent pressure, and do 5–10 strokes per side. Avoid pull-through sharpeners on Japanese knives and electric sharpeners on any knife you value, as both remove excessive metal and can damage the edge geometry.
What is the difference between honing and sharpening?
Honing straightens the existing edge without removing metal — it realigns microscopic bends caused by normal use. Sharpening grinds away metal to create a new edge. Hone your knife before every cooking session (15 seconds). Sharpen on a whetstone every 3–6 months, or when honing no longer restores cutting performance.
What angle should I sharpen my kitchen knife?
15 degrees per side for Japanese knives (Shun, Global, MAC). 20 degrees per side for Western knives (Wüsthof, Henckels, Victorinox). A quick way to find the angle: stack two matchbooks under the knife spine while the blade rests flat on the stone — that’s approximately 15 degrees. Add a coin for 20 degrees.
Can I use a pull-through sharpener on a Japanese knife?
No. Pull-through sharpeners use fixed V-slots set at 20–25 degrees. Japanese knives are ground to 15 degrees. The mismatch tears the edge instead of sharpening it, and the coarse carbide inserts remove excessive metal. Use a whetstone for Japanese knives — it’s the only method that matches their thinner edge geometry.
How often should I sharpen my kitchen knife?
For a home cook using their knife 4–5 times per week, whetstone sharpening every 3–6 months is typical. Hone with a steel before every cooking session. If you cut bones, frozen food, or hard vegetables frequently, you may need to sharpen more often. Using a wood or plastic cutting board (not glass or ceramic) extends time between sharpenings significantly.
Looking for a knife that stays sharp longer?
We tested 5 chef’s knives on edge retention, balance, and steel quality.
View Best Chef’s Knives 2026 →Related: Best Chef’s Knives 2026 · Best Cutting Boards 2026 · How to Choose a Chef’s Knife
Affiliate disclosure: Some links on this page are affiliate links. We earn a small commission if you buy — at no extra cost to you. Editorial content is independent of affiliate relationships. Full disclosure →